
Guide to Photographing Your Home
Great design starts with a clear understanding of your space. Your photos help us create realistic design concepts, while your walk-through video helps your designer understand how the property connects as a whole.
Whenever available, we strongly recommend using our professional photography service. We’ll coordinate the photography and make sure we have the clear, straight-on images and supporting angles needed to create the best possible design and most realistic visual results.
If professional photography isn’t in the budget or available in your area, don’t worry. You do not need professional equipment or photography experience. A smartphone is perfectly fine.
What We Need:
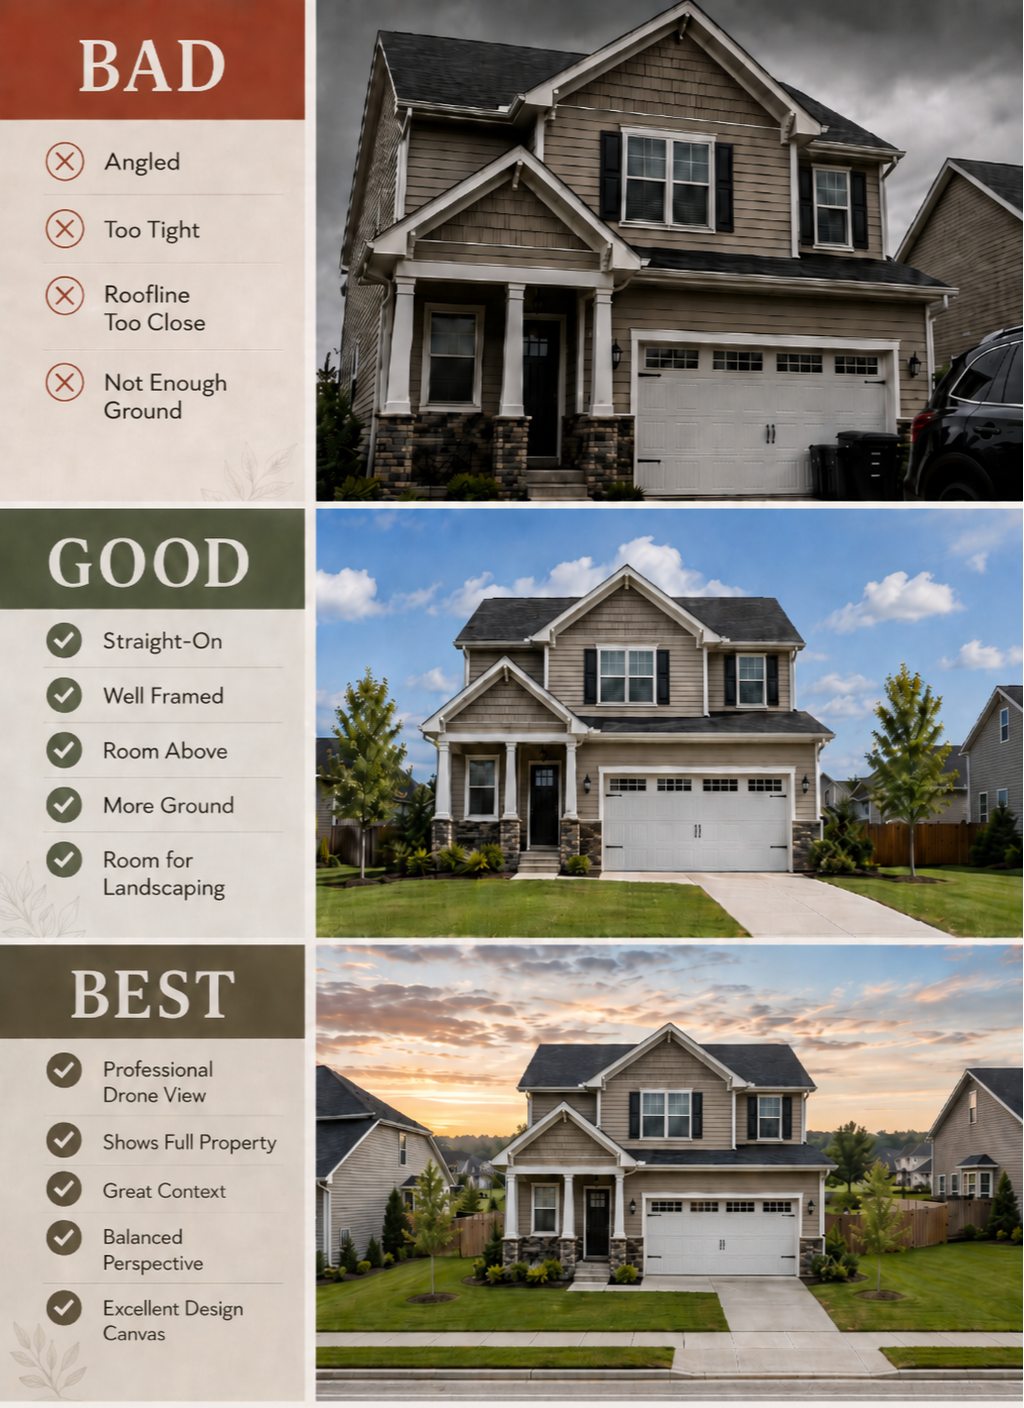
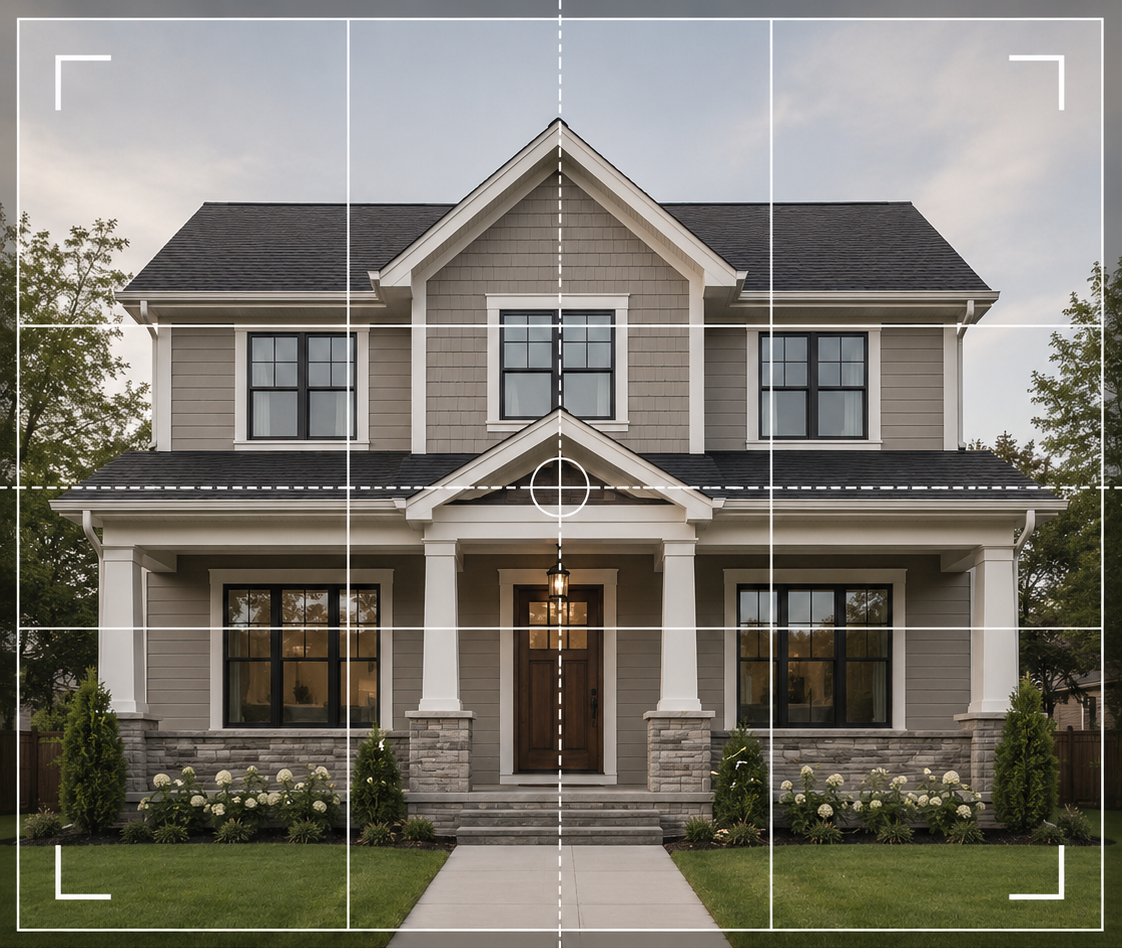
One clear, straight-on photo of each area you want designed
Enough ground visible to allow room for landscaping and other design elements
A few feet of space above the roofline or project area
Wider photos showing how the spaces connect
Photos of important utilities, equipment, or problem areas
Close-up photos of anything you want to keep, match, or incorporate
A simple walk-through video of the property
Don’t stress about getting everything perfect. Send us the best photos you can. We’ll review your images and reach out if we need a clearer angle, additional view, or different perspective.
Take Clear, Straight-On Photos
Whenever possible, stand directly in front of the area you are photographing rather than taking the photo from an angle.
For your primary design photo, try to position yourself as close as possible to the center of the home or project area and point the camera directly toward it.
Keep your phone level and use the standard camera setting, typically 1x, whenever possible. Avoid using the 0.5x ultra-wide setting for primary design photos, as it can distort the proportions of the home.
Hold your phone horizontally, in landscape orientation, for your primary design photos unless we specifically ask otherwise.
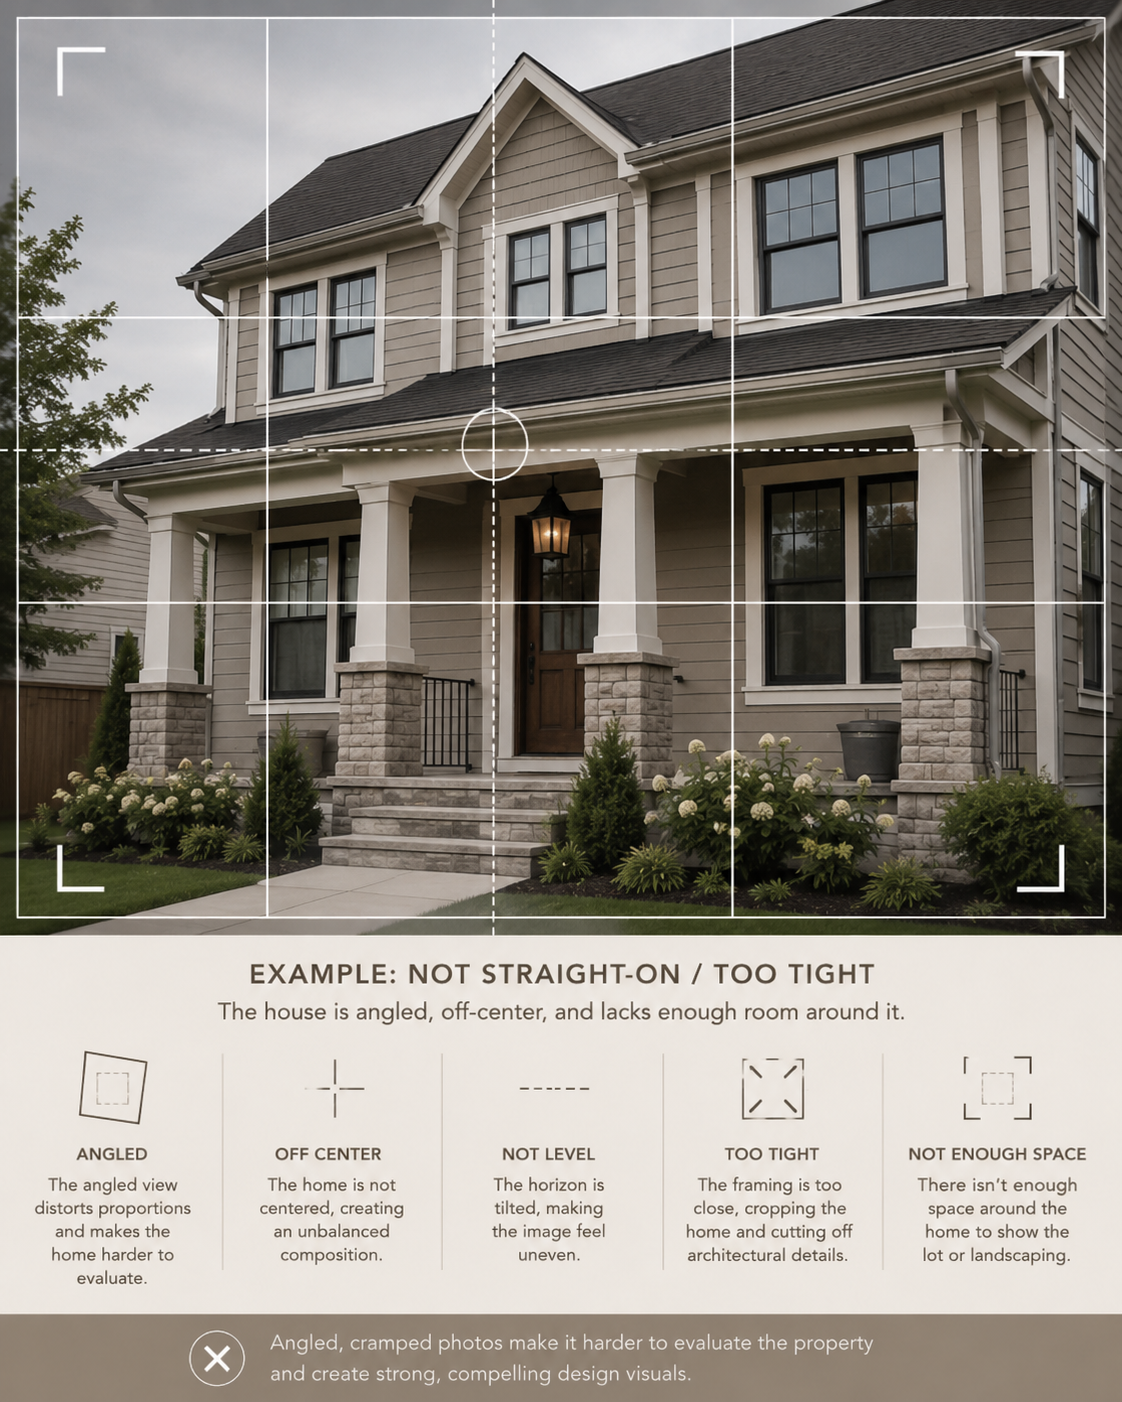
Need a better angle? Sometimes the best view of a property is difficult to capture from ground level.
If it is safe to do so, taking a photo from a ladder, upper-story window, or elevated position can help create a clearer and more useful image.
A basic consumer drone can also be helpful for certain properties. If you own one, or have a friend who does, a slightly elevated, straight-on drone photo can provide an excellent view of the home and surrounding property.
If you cannot get a clear, straight-on photo, send us what you have. We’ll review it and reach out if we need another angle or can guide you on the best position or approach.
Avoid framing the house or project area too tightly.
A good photo should include at least a few feet of visible space above and below the area you want designed. For exterior home photos, make sure there is plenty of ground visible in front of the house. This gives your designer the visual space needed to add or rework landscaping, planting beds, walkways, and other design elements in a realistic way.
Think of the photo as our design canvas. The more complete the canvas, the more flexibility we have to show you how the entire space could come together.
Leave Room Around the Property
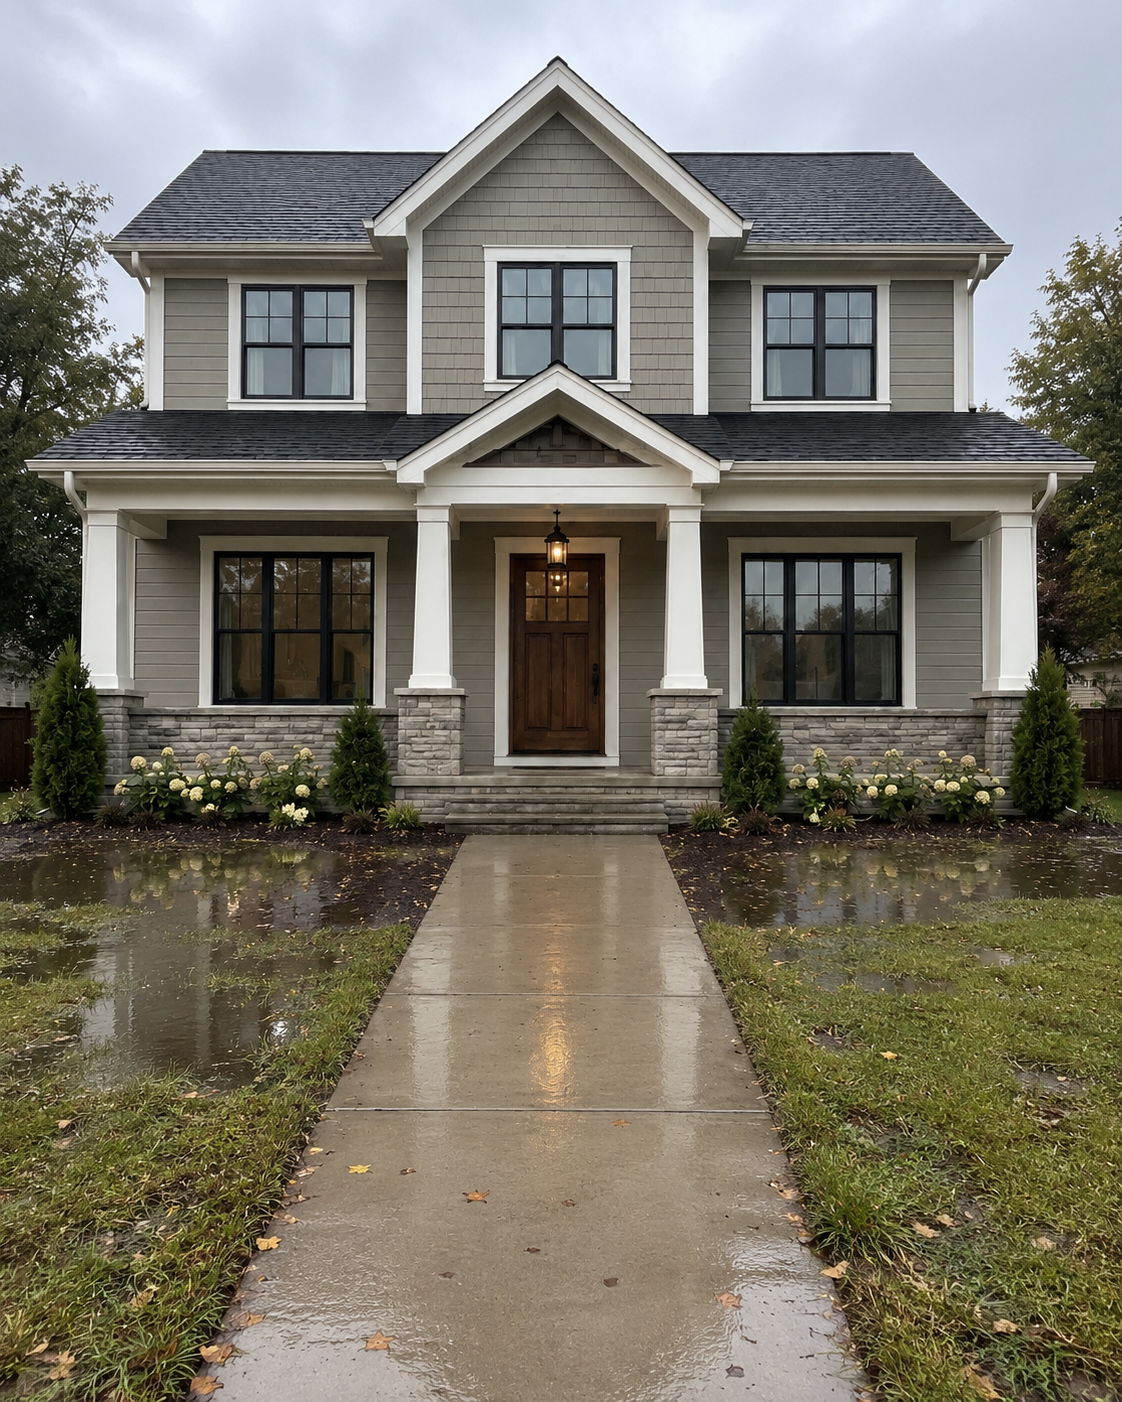
Pro Tip: Don’t be shy. Don’t hide the less attractive or complicated parts of the property. Show us drainage issues, utility equipment, HVAC units, meters, generators, downspouts, damaged areas, awkward transitions, invasive plants, and anything else that may affect the project.
Show Us the Bigger Picture
In addition to your primary straight-on photos, take a few wider images from different angles so we can understand how the property fits together.
Depending on your project, this may include:
The full front or rear of the home
Each side of the property
Views looking toward and away from the house
Driveways, walkways, patios, decks, and other hardscape
Existing landscaping, trees, hedges, and planting beds
Fences and property boundaries
HVAC equipment, generators, utility areas, gutters, and downspouts
Areas with drainage, grading, privacy, or access concerns
Features you would like to keep, remove, or change
When in doubt, take the photo. More context is usually helpful.
Final
Tips & Tricks
Take photos during daylight whenever possible.
Avoid taking photos directly into harsh sunlight if it makes the home difficult to see.
Use your phone’s regular camera setting rather than portrait mode.
Avoid zooming in excessively. It is usually better to physically move closer or take an additional detail photo.
Make sure important architectural features are not cut off.
Please send original, full-size images whenever possible. Avoid cropping, filtering, or heavily editing photos before sending them.
Don’t worry if your lawn is dormant, plants are not blooming, or the property is not looking its best. We want to see the property as it actually exists.
Don’t forget to send us your walkthrough video.